
Getting Started with Rugix
Add Nexigon Agent to a Rugix Bakery image, connect a device to Nexigon Hub, and open a remote connection. Use this guide after completing the Rugix quickstart.
Before You Start
You need a working Rugix Bakery project, a device or VM to run its image, and a Nexigon account with permission to add devices to a project.
Create or select an organization and project in Nexigon. Nexigon Cloud creates a Default Project for a new organization. You can skip S3 configuration until you need software artifact storage.
Create a Deployment Token
Open Devices, choose the project, and select Add Device → Deployment Token. Optionally give the token a name, choose Create, and copy it immediately. It cannot be viewed again.
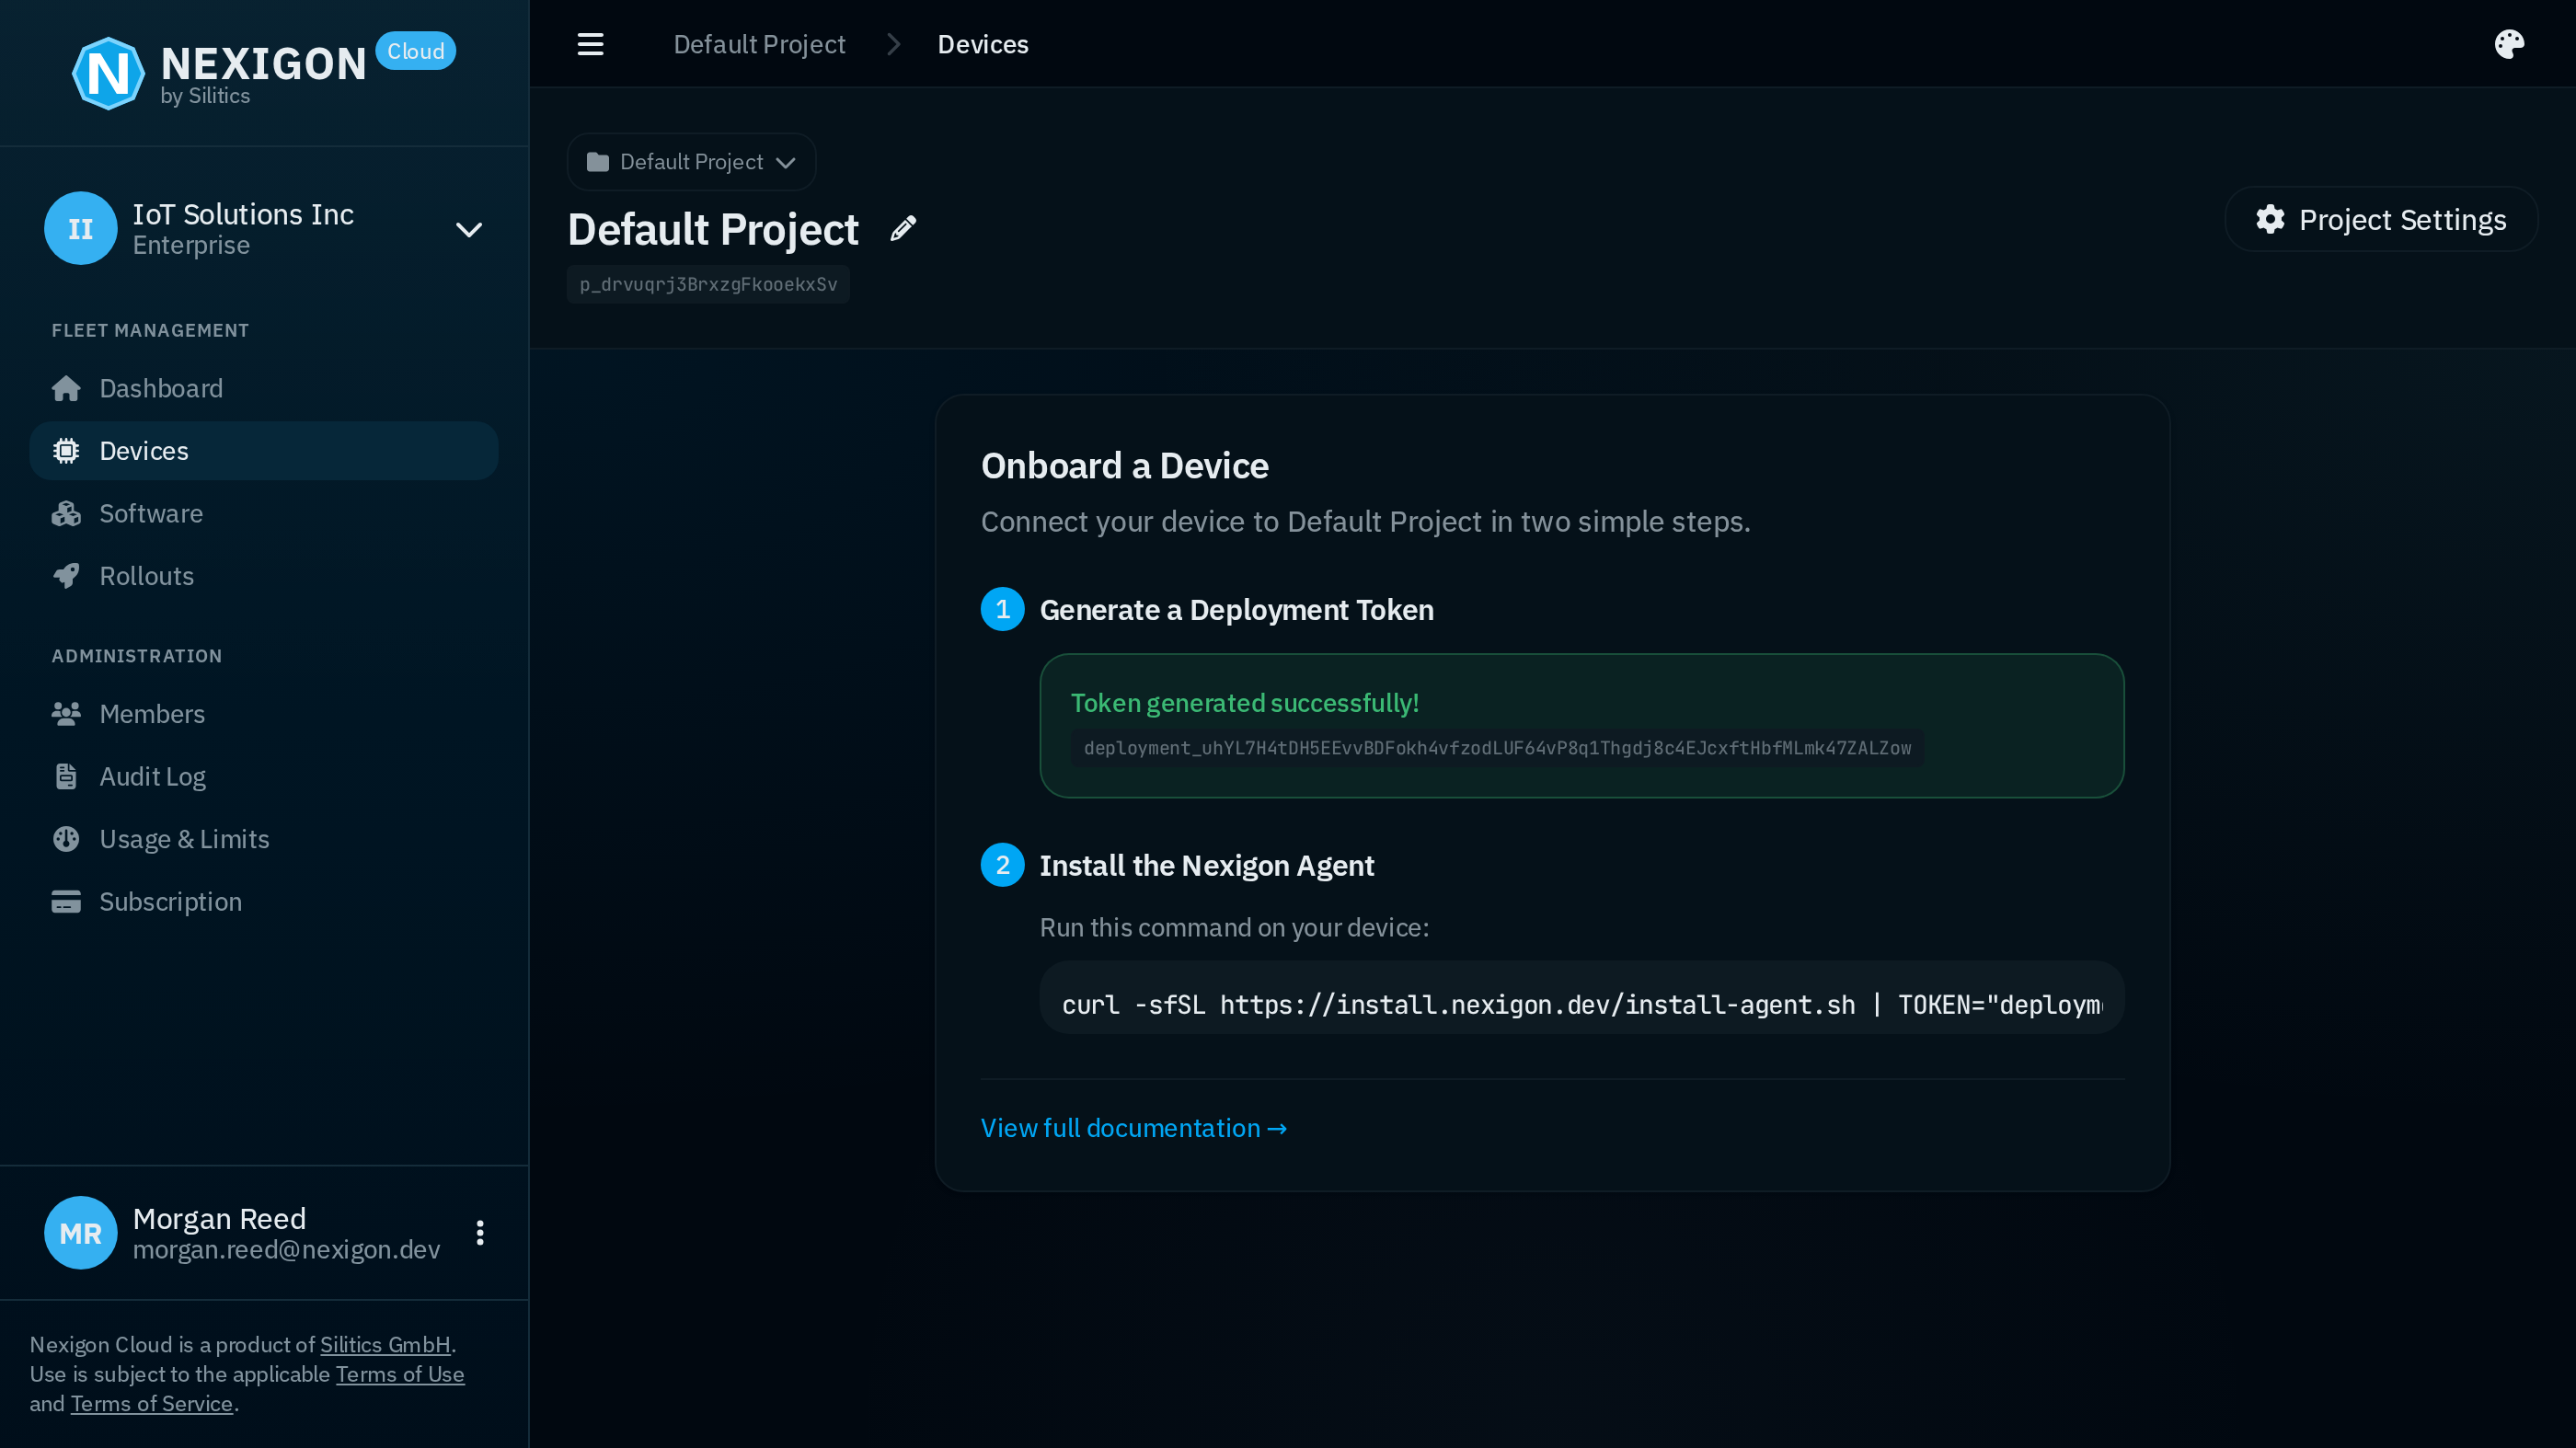
This guide configures credentials at image build time. For a production workflow that pairs each device separately, see Device Provisioning, which requires Nexigon Agent 0.6 or later.
Nexigon uses three pieces of information to connect a device:
- A deployment token selects the project the device can join.
- A device certificate and private key authenticate its connection. Each device generates its own key and certificate.
- A device fingerprint identifies the device across certificate and token changes. It must be stable and unique within the project.
With Auto Accept enabled on the deployment token, Nexigon Hub accepts a new device’s first certificate automatically. Later connections must present an accepted certificate and the correct fingerprint. These acceptance checks let you use the generated self-signed certificate without operating your own certificate authority. If Auto Accept is disabled, accept the pending certificate in Nexigon before opening a remote connection.
See Device Authentication for the full identity model.
Add the Nexigon Recipes
Add the Nexigon recipe repository:
[repositories]
nexigon = { git = "https://github.com/nexigon/nexigon-rugix.git", branch = "v0.3" }
Add nexigon/nexigon-agent to install Nexigon Agent and
nexigon/nexigon-agent-config to configure it. For a project based on the
Rugix quickstart, the customized layer can look like this:
#:schema https://raw.githubusercontent.com/silitics/rugix/refs/tags/v0.8.0/schemas/rugix-bakery-layer.schema.json

parent = "core/debian-bookworm"

recipes = [
    # Set a static hostname.
    "core/set-hostname",
    # Persist `/root`.
    "core/persist-root-home",
    # Setup and enable SSH.
    "core/ssh",
    # Setup the network.
    "rugix-extra/debian-setup-network",
    # Setup the time synchronization.
    "rugix-extra/debian-setup-timesyncd",
    # Enable discovery of the system in the local network.
    "rugix-extra/avahi",
    # Setup Nexigon Agent.
    "nexigon/nexigon-agent",
    # Configure Nexigon Agent.
    "nexigon/nexigon-agent-config",
    # Install a static web site.
    "hello-world",
]

[parameters."nexigon/nexigon-agent-config"]
# Enable the remote terminal and declare web UI export.
extra_config = """
[terminal]
enabled = true
user = "root"

[forwarding]
enabled = true
allowed-tcp-ports = [22]

[[exports]]
name = "Web UI"
protocol = "http"
port = 80
"""
The extra configuration enables the browser terminal and exports the web server on port 80. It also allows SSH forwarding to port 22. These ports permit raw TCP access; see TCP Forwarding for the policy rules.
Set the Credentials and Build
The nexigon-agent-config recipe reads the Nexigon Hub URL and deployment
token from your project’s .env file:
NEXIGON_HUB_URL="https://eu.nexigon.cloud"
NEXIGON_TOKEN="deployment_..."
Replace the values with your instance URL and token. Add .env to
.gitignore to keep credentials out of version control.
Build and boot the image using your Rugix project’s normal workflow. Nexigon Agent starts on boot. Refresh Devices in Nexigon and open the newly connected device.
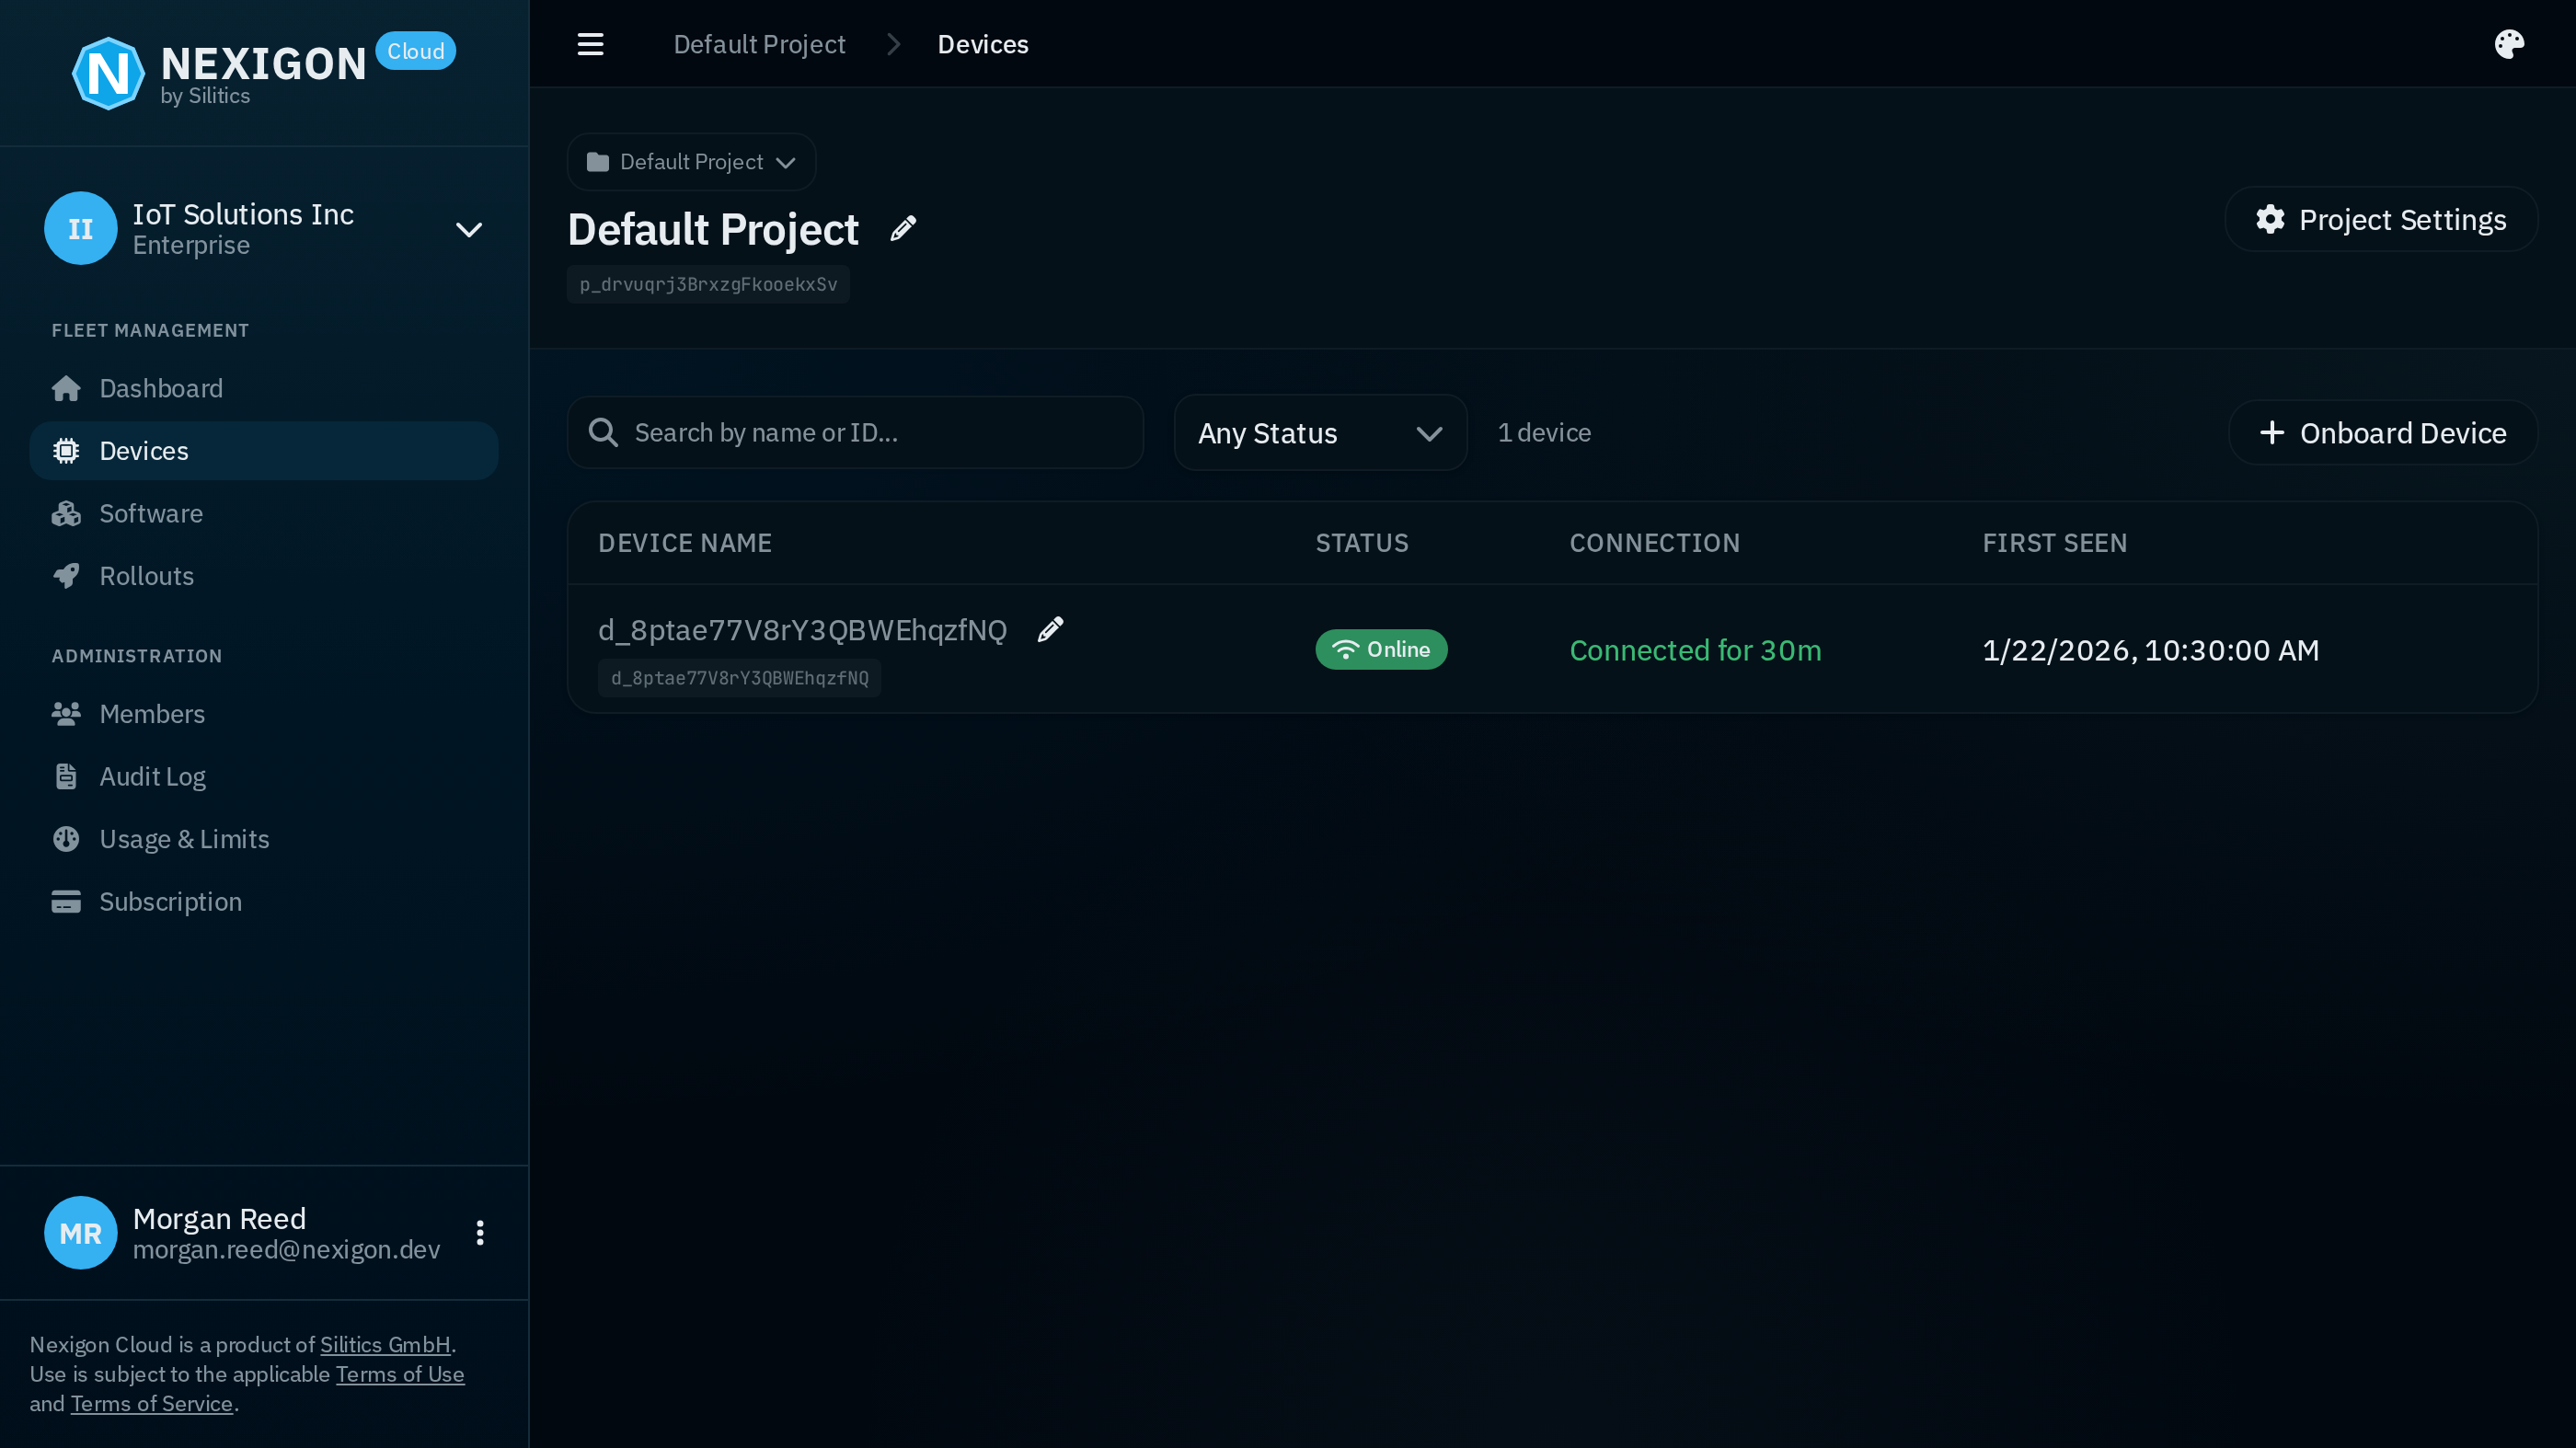
If the device does not appear, inspect journalctl -u nexigon-agent on the
device. Check the URL, token, and network connection. A token without
Auto Accept requires you to accept the device’s pending certificate.
Open a Remote Connection
On the device page, choose Generate URL and open a URL for the web server on port 80. The generated URL contains an access token for that service. Anyone with the link can use it during its validity period; treat the URL as a credential.
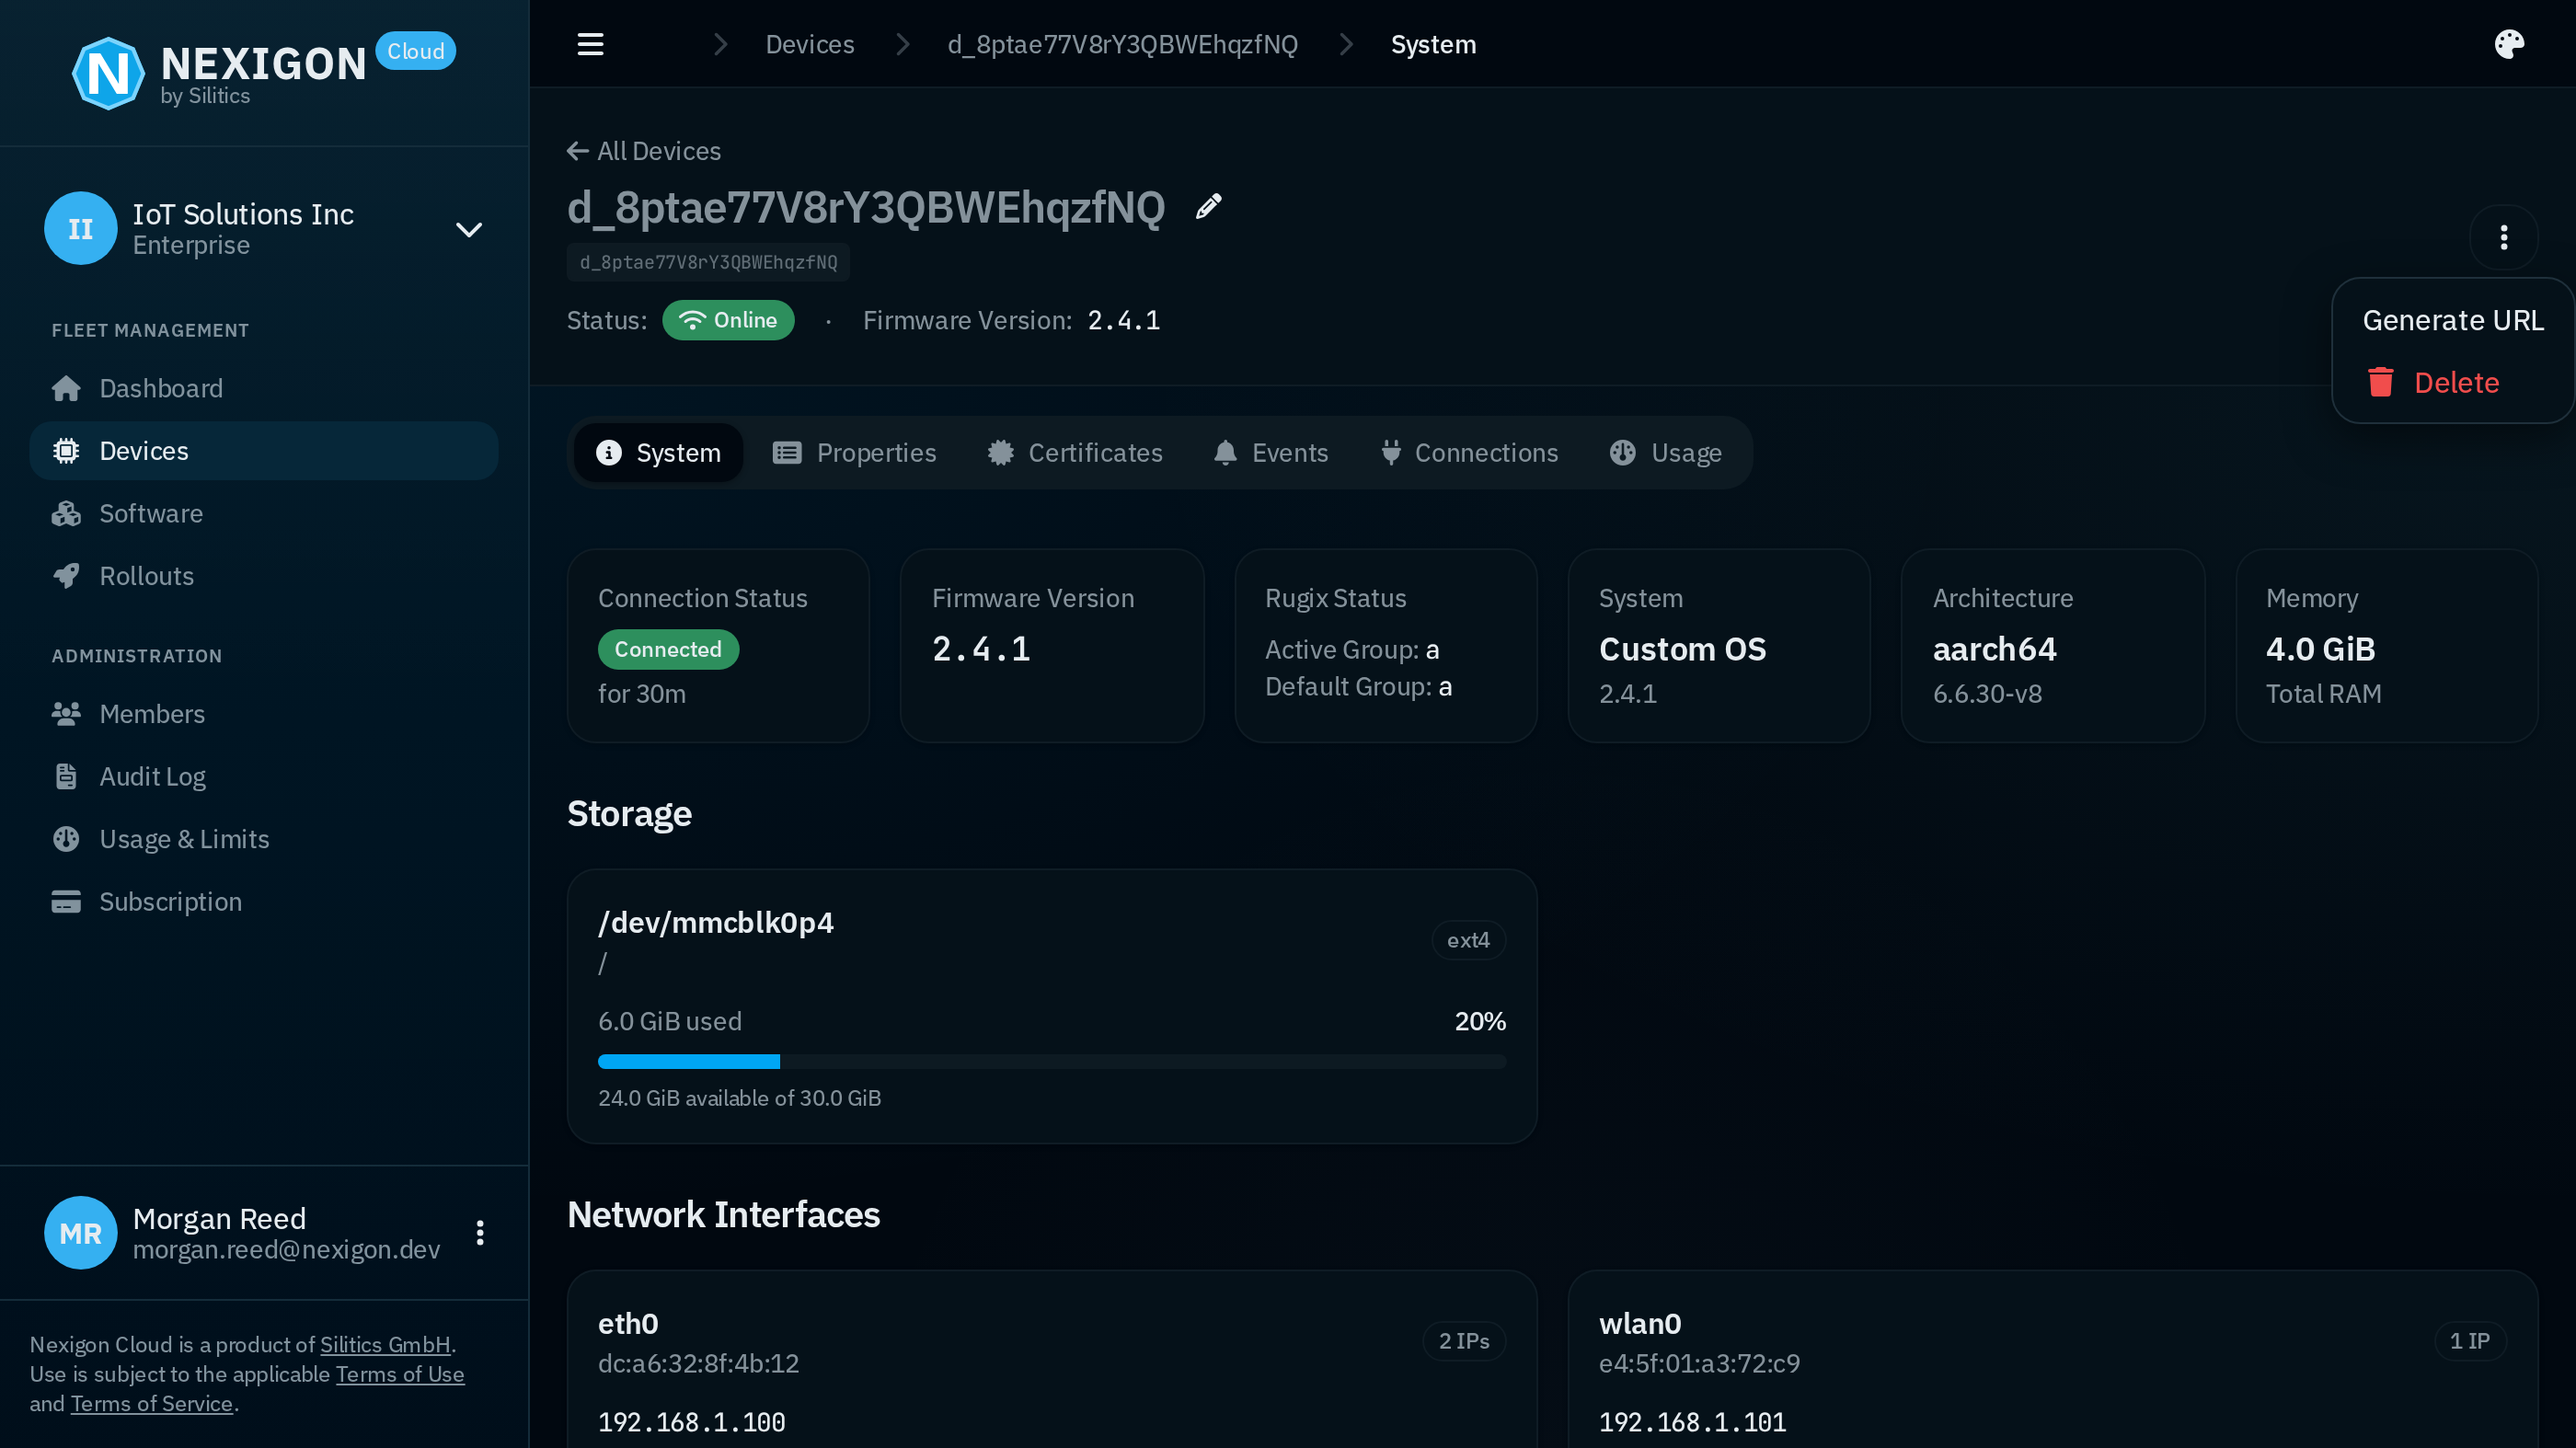
For SSH, install and configure Nexigon CLI
on your workstation. Copy the device ID, beginning with d_, from Nexigon,
then run this from the directory containing the downloaded binary:
./nexigon-cli forward <device-id> 2222:22The pair 2222:22 maps workstation port 2222 to device port 22. Nexigon CLI
authenticates to Nexigon Hub with your API token, while Nexigon Agent uses the
device’s credentials. Your SSH client then authenticates separately to the
device’s SSH server using its own username and key or password.
Keep it running and connect from another terminal:
ssh -p 2222 root@localhostUse the SSH credentials configured in your image.
Enable System Updates
Continue with Set Up Rugix OTA Updates to install the update integration. The Nexigon Rugix Bakery template includes update recipes, release scripts, and CI configuration for a new project.